上篇学习了cobbler pxe 安装的大致流程以及采用默认分区方式安装centos7系统。
这里深入学习ks文件的具体参数 。
ks.cfg文件又叫kickstart.cfg文件,主要被用于linux系统安装过程中。
如CentOS系统中/root/anaconda-ks.cfg 就是kickstart.cfg文件,指明了当前系统预安装时环境的设置。
linux系统安装大致可分为两大步骤:
第一阶段、预安装环境
此阶段为linux安装过程中的预安装环境,提供安装选项的接口,可以将它看做windows安装ghost 系统时的pe 环境。
第二阶段、自动安装过程
此阶段会按照第一阶段设置的参数自动安装。
Linux安装过程中的第一阶段可分为交互式和非交互式两种类型
交互式就是跟普通安装一样,按照提示一步一步操作
非交互式则通过读取kickstart.cfg 文件的配置,进行自动安装。
获取ks文件的方式有很多如:直接在cdrom中获取,常见的方式还有http ftp nfs 等方式。在读取ks文件之前,可通过cdrom 、USB、pxe等方式来引导。
ks.cfg文件可分为三段:命令段、软件包段、脚本段。
1、命令段包括时区选择、安装方式、语言选择等系统配置。分为可选项和必选项,若是缺少某些必选项,安装会中断让用户选择此项的选项。
2、软件包段:
%packages
@group_name ##指定安装的软件包组
package_name ##指定安装的软件包
-package_name ##指定不按照的软件包
%end ##到这里结束
3、脚本段:
%pre ##预安装脚本,由于只依赖于启动镜像,支持的命令较少。
%post ##后安装脚本,几乎支持所有命令
这里以默认ks.cfg文件为例:
#platform=x86, AMD64, or Intel EM64T# System authorization informationauth --useshadow --enablemd5 #(必需)系统认证方式,默认加密但不隐藏(shadow)。--useshadow(使用隐藏密码) --enablemd5(使用MD5加密方式)# System bootloader configurationbootloader --location=mbr #(必需),设定boot loader参数。--location设定引导记录位置mbr(默认值)# Partition clearing informationclearpart --all --initlabel #(可选)在建立新分区前清空系统上的原有分区表,默认不删除分区。--all(擦除系统所有原有分区)--initlabel(初始化磁盘卷标为系统架构的默认卷标)# Use text mode installtext #(可选)以文本方式进行kickstart安装,默认为图形界面 # Firewall configurationfirewall --enabled #(可选)配置系统防火墙选项。--enabled(拒绝外部发起的任何主动链接)# Run the Setup Agent on first bootfirstboot --disable #(可选)决定系统在第一次引导是是否启用“设置代理”,若启用“设置代理”,firstboot软件包必需被安装。--disable(不启用设置代理),如果不指定这个选项缺省为禁用。# System keyboardkeyboard us #(必需)设置键盘类型,一般为us。# System languagelang en_US #(必需)设置安装过程中的语言及系统的缺省语言,默认英文en_US,安装中文时需要后期%packages部分安装中文支持组件# Use network installationurl --url=$tree #(可选)通过FTP或HTTP从网络获取安装树。--url(指定资源位置)$yum_repo_stanza #PXE安装系统时(可选)该参数会引用用户添加的cobbler repo 配置# Network information$SNIPPET('network_config') #(可选)网络配置信息# Reboot after installationreboot #(可选)在系统安装完成后默认重启系统#Root passwordrootpw --iscrypted $1$pxepxe$283B/mrqHX6irt0NeAFtf. #(必需)设置系统root密码。--iscrypted(设置的密码为加密过的串)# SELinux configurationselinux --disabled #(可选)设置系统selinux状态,默认为enforcing# Do not configure the X Window Systemskipx #(可选)不对系统的X进行设置# System timezonetimezone America/New_York #(可选)设置系统时区 # Install OS instead of upgradeinstall #(可选)明确指定系统本次安装全新系统,为默认选项# Clear the Master Boot Recordzerombr #(可选)清除mbr信息,同时会清空系统原有分区表。若指定了zerombr,且yes是他唯一的参数。任何磁盘上无效的分区表都将被初始化。格式为zerombr yes。其余格式均无效。 # Allow anaconda to partition the system as neededautopart #(install模式必需)使用默认分区方式安装%pre #预安装脚本(支持的命令很少)$SNIPPET('log_ks_pre')$SNIPPET('kickstart_start')$SNIPPET('pre_install_network_config')# Enable installation monitoring$SNIPPET('pre_anamon')%end%packages #软件包段 %package_name 指定想要安装的软件包组;package_name 指定想要安装的软件包;-package_name 指定不安装的软件包 $SNIPPET('func_install_if_enabled')%end%post --nochroot #安装后脚本。允许用户指定想在chroot环境之外运行的命令$SNIPPET('log_ks_post_nochroot')%end%post #安装后脚本$SNIPPET('log_ks_post')# Start yum configuration$yum_config_stanza# End yum configuration$SNIPPET('post_install_kernel_options')$SNIPPET('post_install_network_config')$SNIPPET('func_register_if_enabled')$SNIPPET('download_config_files')$SNIPPET('koan_environment')$SNIPPET('redhat_register')$SNIPPET('cobbler_register')# Enable post-install boot notification$SNIPPET('post_anamon')# Start final steps$SNIPPET('kickstart_done')# End final steps%end 参考:https://www.linuxidc.com/Linux/2017-04/142587p2.htm http://www.it610.com/article/2948354.htm
范例1:CentOS6.5最小化
1、/boot 200M
2、swap 2G
3、/ 剩余空间
1、首先更改相关ks文件
[root@localhost kickstarts]# vim CentOS6.5mini.cfg
2、在part 分区方式中注释掉autopart ,并添加相关参数。
# Allow anaconda to partition the system as needed#autopart part /boot --fstype=ext4 --asprimary --size=200 #--fstype 新增普通分区时指定分区类型。part swap --fstype=swap --asprimary --size=2048 #--asprimary 强制指定该分区为主分区,若指定主分区失败,会导致安装终止。part / --fstype=ext4 --asprimary --grow --size=200 #--size 设置分区大小 --grow 利用可用的磁盘空间让分区自动增长,或者增长到设置的maxsize值。
3、最后执行同步命令:
[root@localhost kickstarts]# cobbler sync
4、打开新的虚拟机设置网络为桥接模式;内存最少分配2G。
出现如下报错
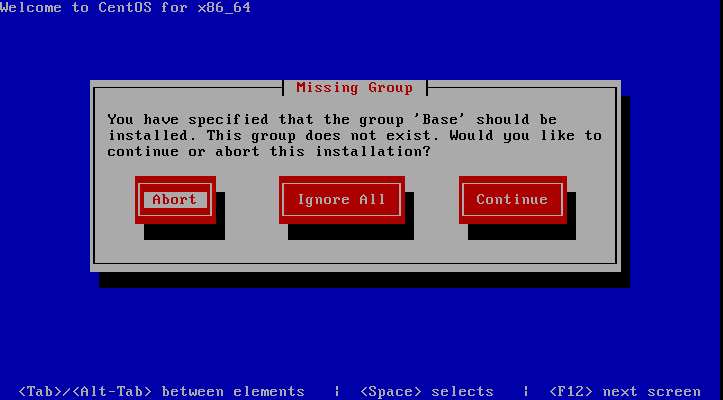
意思是指定安装的“base”软件包组不存在。因为安装的CentOS6.5最小化的盘。此时可以选择忽略全部,或者在ks.cfg文件中将指定安装的软件包注释掉。(检查ks文件发现并没安装多余的软件包包括“base”,这里先忽略掉。同样的配置文件centos7 最小化系统未出现该界面。)
安装成功如图:

范例2:安装要求:centos7最小化安装
1、时区为上海,主机域名为pxetext.com
2、/boot 目录200M
3、swap 2G
4、sda其余空间都给/目录
5、sdb全部空间挂载到/data1
6、sdc全部空间挂载到/data2
根据要求修改ks文档:
1、时区修改:
# System timezonetimezone America/New_Yorktimezone Asia/Shanghai
2、域名修改:我们在安装后脚本中添加echo "pxetest.com" > /etc/hostname
%postecho "pxetest.com" > /etc/hostname$SNIPPET('log_ks_post')# Start yum configuration 3、分区设置:
# Allow anaconda to partition the system as needed#autopartpart /boot --fstype=xfs --ondisk=sda --size=200 #主要当有多块磁盘分区时,需要--ondisk=指定磁盘进行分区part swap --fstype=swap --ondisk=sda --size=2048part / --fstype=xfs --ondisk=sda --grow --size=100part /data1 --fstype=xfs --ondisk=sdb --grow --size=100part /data2 --fstype=xfs --ondisk=sdc --grow --size=100
4、同步:
[root@localhost kickstarts]# cobbler sync
安装完成后
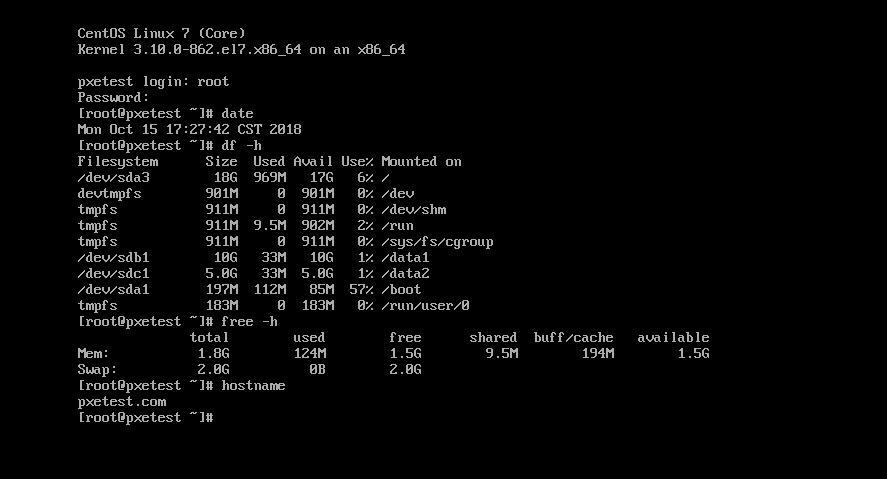
符合要求。
目前要完成系统的安装,需要在该界面下选择,不选择就没办法安装。不算完全自动化,那么如何实现完全自动化安装呢,答案是绑定mac地址安装
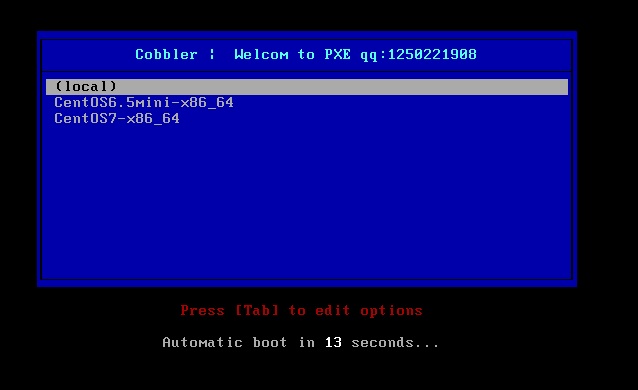
范例3、
1、完全自动化安装centOS7系统(包含双网卡)
2、第一块网卡为内网,ip 10.0.0.81,子网掩码255.255.255.0。
3、第二块为外网,ip192.168.10.81,子网掩码255.255.255.0,网关192.168.10.1,DNS为223.5.5.5
4、/boot 500M SWAP 4096M sda其余空间给/
5、sdb sdc 空间全部分给/data 目录
6、时区为shanghai,主机域名为wang
之前安装的都是最小化的系统,此次范例安装DVD版CentOS7.2.1511
第一步、先执行cobbler check
[root@localhost ~]# cobbler checkNo configuration problems found. All systems go.
第二部、挂载
[root@localhost ~]# mount /dev/sr0 /mntmount: /dev/sr0 is write-protected, mounting read-only[root@localhost ~]# cobbler import --path=/mnt/ --name=CentOS7.2.1511-x86_64 --arch=x86_64
查看是否挂载成功
[root@localhost ~]# cd /var/www/cobbler/ks_mirror/[root@localhost ks_mirror]# lsCentOS6.5mini-x86_64 CentOS7.2.1511-x86_64 CentOS7-x86_64 config[root@localhost ks_mirror]# ls CentOS7.2.1511-x86_64CentOS_BuildTag GPL LiveOS RPM-GPG-KEY-CentOS-7EFI images Packages RPM-GPG-KEY-CentOS-Testing-7EULA isolinux repodata TRANS.TBL
编辑ks文件
[root@localhost kickstarts]# cd /var/lib/cobbler/kickstarts/[root@localhost kickstarts]# cp sample_end.ks CentOS7.2.1511.cfg[root@localhost kickstarts]# vim !$vim CentOS7.2.1511.cfg
# System timezonetimezone Asia/Shanghai
由于非最小化安装,可以选择添加需要的软件包和软件包组(这里复制主机系统anaconda-ks.cfg)。
%packages@base@core@desktop-debugging@dial-up@directory-client@fonts@gnome-desktop@guest-desktop-agents@input-methods@internet-browser@java-platform@multimedia@network-file-system-client@print-client@x11binutilschronyftpgcckernel-develkexec-toolsmakeopen-vm-toolspatchpython%end
由于安装图形界面,需要注释掉以下参数
# Do not configure the X Window System#skipx
这里两块磁盘同时挂载到/data 目录中,普通分区方式无法完成,以下分区方式,安装完后会发现只挂载sdc磁盘,因为sdc的挂载点会将sdb的挂载点覆盖。
#该分区方式为错误演示 part /data --fstype=xfs --ondisk=sdb --grow --size=200part /data --fstype=xfs --ondisk=sdc --grow --size=200
要将两块磁盘同时挂载到/data 目录,可以把两块盘做成raid0方式,也可以使用lvm逻辑卷。
# Allow anaconda to partition the system as needed#autopartpart /boot --fstype=xfs --ondisk=sda --size=500part swap --fstype=swap --ondisk=sda --size=4096part / --fstype=xfs --ondisk=sda --grow --size=200#part raid.01 --ondisk=/dev/sdb --grow --size=200 #使用raid0#part raid.02 --ondisk=/dev/sdc --grow --size=200#raid /data --level=0 --device=md0 raid.01 raid.02part pv.11 --ondisk=/dev/sdb --grow --size=200 #使用lvm逻辑卷part pv.12 --ondisk=/dev/sdc --grow --size=200volgroup myvg pv.11 pv.12logvol /data --vgname=myvg --name=mydata --fstype=xfs --grow --size=200
ks文件编辑完成,保存退出。
修改默认ks 文件
[root@localhost kickstarts]# cobbler profile edit --name=CentOS7.2.1511-X86_64 --kickstart=/var/lib/cobbler/kickstarts/CentOS7.2.1511.cfg[root@localhost kickstarts]# cobbler profile report --name=CentOS7.2.1511-x86_64Name : CentOS7.2.1511-X86_64TFTP Boot Files : {}Comment : DHCP Tag : defaultDistribution : CentOS7.2.1511-x86_64Enable gPXE? : 0Enable PXE Menu? : 1Fetchable Files : {}Kernel Options : { 'biosdevname': '0', 'net.ifnames': '0'}Kernel Options (Post Install) : {}Kickstart : /var/lib/cobbler/kickstarts/CentOS7.2.1511.cfgKickstart Metadata : {}Management Classes : []Management Parameters : < >Name Servers : []Name Servers Search Path : []Owners : ['admin']Parent Profile : Internal proxy : Red Hat Management Key : < >Red Hat Management Server : < >Repos : []Server Override : < >Template Files : {}Virt Auto Boot : 1Virt Bridge : xenbr0Virt CPUs : 1Virt Disk Driver Type : rawVirt File Size(GB) : 5Virt Path : Virt RAM (MB) : 512Virt Type : kvm 前面我们提到过,CentOS7系统的网卡命名规则与以前的系统不一致,为了运维工作的标准化,cobbler 可以将安装7系统的网卡命名规则改成“ethx”。
[root@localhost kickstarts]# cobbler profile edit --name=CentOS7.2.1511-x86_64 --kopts='net.ifnames=0 biosdevname=0'
下面是最关键的一步,这是两块网卡的mac地址。


[root@localhost kickstarts]# cobbler system add --name=volac --mac=00:50:56:2D:4D:AC --profile=CentOS7.2.1511-x86_64 --ip-address=10.0.0.81 --subnet=255.255.255.0 --interface=eth0 --static=1[root@localhost kickstarts]# cobbler system edit --name=volac --mac=00:50:56:25:40:BC --profile=CentOS7.2.1511-x86_64 --ip-address=192.168.10.81 --subnet=255.255.255.0 --gateway=192.168.10.1 --interface=eth1 --static=1 --hostname=wang --name-servers="223.5.5.5"[root@localhost kickstarts]# cobbler sync
接下来,打开虚拟机。没有出现选择界面,直接进入安装模式。

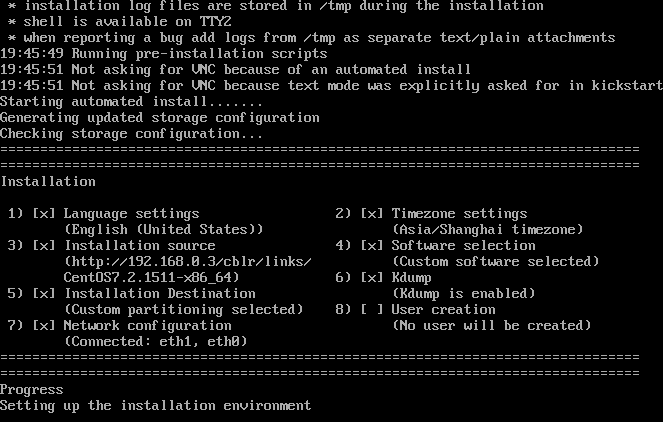
安装完成,符合系统要求


范例四:客户机自己安装系统
一、不指定system 模板,让客户端自己安装一台系统
1、下载epel包(不指定epel源无法安装koan)
[root@localhost ~]# wget -O /etc/yum.repos.d/epel.repo http://mirrors.aliyun.com/repo/epel-7
2、安装koan安装包
yum -y install koan
此处出现一点小插曲,
[root@localhost ~]# yum -y install koanLoaded plugins: fastestmirror, langpacksbase | 3.6 kB 00:00 http://mirrors.aliyun.com/epel/7/x86_64/repodata/repomd.xml: [Errno 12] Timeout on http://mirrors.aliyun.com/epel/7/x86_64/repodata/repomd.xml: (28, 'Operation too slow. Less than 1000 bytes/sec transferred the last 30 seconds')Trying other mirror.epel | 3.2 kB 00:00 extras | 3.4 kB 00:00 updates | 3.4 kB 00:00 (1/3): epel/x86_64/updateinfo | 934 kB 00:01 (2/3): updates/7/x86_64/primary_db | 6.0 MB 00:03 (3/3): epel/x86_64/primary ....... file /usr/share/locale/zh_TW/LC_MESSAGES/libvirt.mo from install of libvirt-libs-3.9.0-14.el7_5.8.x86_64 conflicts with file from package libvirt-client-1.2.17-13.el7.x86_64 file /usr/share/locale/zu/LC_MESSAGES/libvirt.mo from install of libvirt-libs-3.9.0-14.el7_5.8.x86_64 conflicts with file from package libvirt-client-1.2.17-13.el7.x86_64Error Summary-------------
字面意思libvirt-libs-3.9.0-14.el7_5.8.x86_64这个安装包与libvirt-client 发生冲突。
解决方法:先卸载libvirt-client程序包
[root@localhost ~]# yum remove libvirt-client
再次安装koan
[root@localhost ~]# yum -y install koan
3、获取192.168.43.43主机中的profile设置(指定cobbler 服务器)
[root@localhost ~]# koan --server=192.168.43.43 --list=profiles- looking for Cobbler at http://192.168.43.43:80/cobbler_apiCentOS7-x86_64CentOS7.2.1511-X86_64CentOS6.5mini-x86_64
4、指定从哪个镜像开始安装
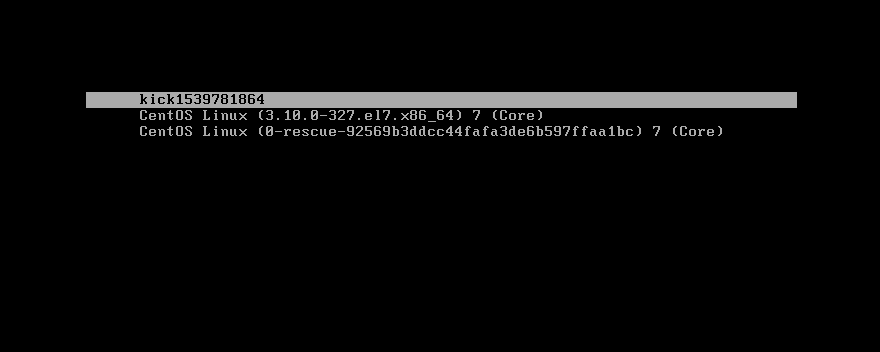
[root@localhost ~]# koan --replace-self --server=192.168.43.43 --profile=CentOS6.5mini-x86_64- looking for Cobbler at http://192.168.43.43:80/cobbler_api- reading URL: http://192.168.43.43/cblr/svc/op/ks/profile/CentOS6.5mini-x86_64install_tree: http://192.168.43.43/cblr/links/CentOS6.5mini-x86_64downloading initrd initrd.img to /boot/initrd.img_koanurl=http://192.168.43.43/cobbler/images/CentOS6.5mini-x86_64/initrd.img- reading URL: http://192.168.43.43/cobbler/images/CentOS6.5mini-x86_64/initrd.imgdownloading kernel vmlinuz to /boot/vmlinuz_koanurl=http://192.168.43.43/cobbler/images/CentOS6.5mini-x86_64/vmlinuz- reading URL: http://192.168.43.43/cobbler/images/CentOS6.5mini-x86_64/vmlinuz- ['/sbin/grubby', '--add-kernel', '/boot/vmlinuz_koan', '--initrd', '/boot/initrd.img_koan', '--args', '"ks=http://192.168.43.43/cblr/svc/op/ks/profile/CentOS6.5mini-x86_64 ksdevice=link kssendmac lang= text "', '--copy-default', '--make-default', '--title=kick1539781864']- ['/sbin/grubby', '--update-kernel', '/boot/vmlinuz_koan', '--remove-args=root']- reboot to apply changes
5、重启
[root@localhost ~]# reboot
选择第一个
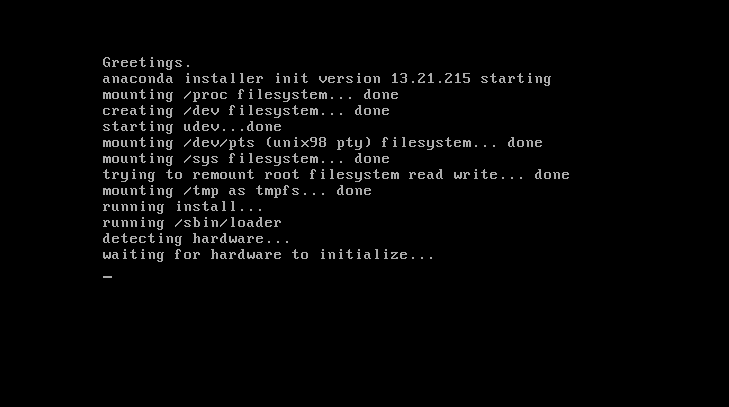
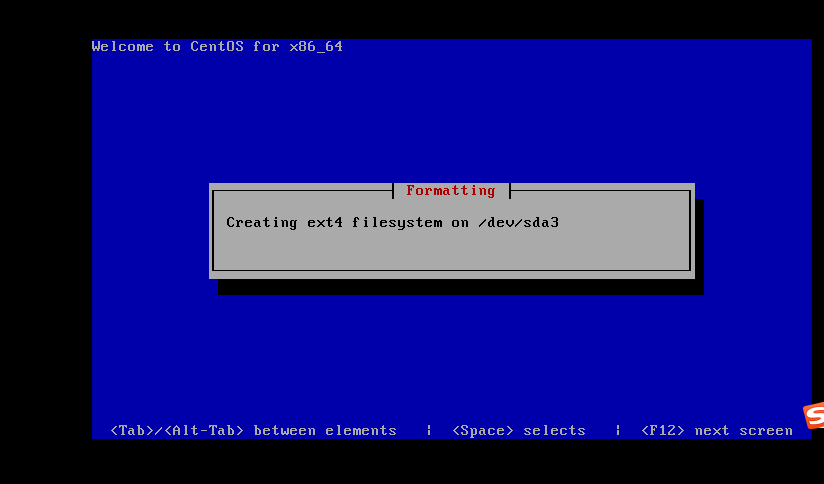
开始安装
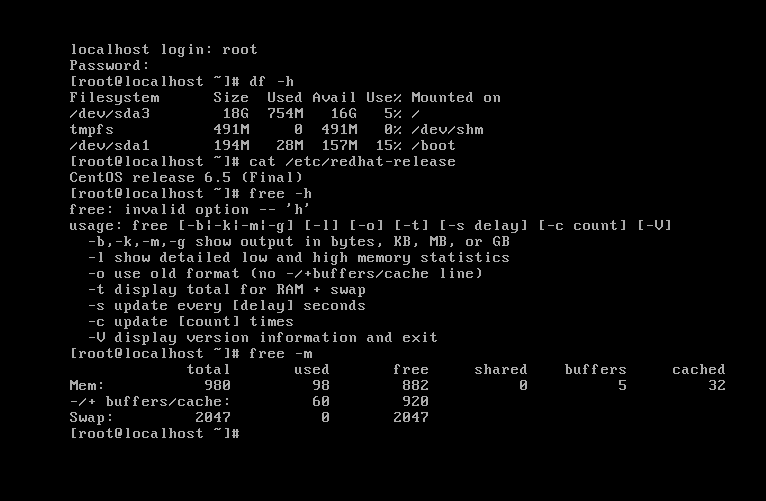
安装完成
二、指定system 模板,让客户端自己安装一台系统(让系统生成指定mac地址的绑定的ip配置信息和其他自定义信息)
和上面一样指定epel源后安装koan 包
[root@localhost ~]# yum -y install epel-release[root@localhost ~]# yum -y install koan
指定cobbler服务器
[root@localhost ~]# koan --server=192.168.43.43 --list=systems- looking for Cobbler at http://192.168.43.43:80/cobbler_apivolac
指定system模板
[root@localhost ~]# koan --replace-self --server=192.168.43.43 --system=volac- looking for Cobbler at http://192.168.43.43:80/cobbler_api- reading URL: http://192.168.43.43/cblr/svc/op/ks/system/volac
重启系统
[root@localhost ~]# reboot
koan安装完成。